Saturday, 3 March 2012

Russian Fudge


Fudge has to be one of may favorite things to make , not only because its so cool to watch it all come together like a science experiment & check if it has reached the soft ball stage but because its tastes so dam fine ! 
I have never meet anyone that doesn't like this fudge. If you grew up in New Zealand it was thing that childhood sweet dreams were made of, always at birthday parties and if you were good you got to lick the beaters and scrape the pot !

I am not usually one to boast but I reckon I make the best Russian Fudge but Russian fudge is well not entirely Russian, its a pretty uniquely kiwi thing and the name for this fudge, which from a search round on the net seems to come from a Polish recipe which is very similar to our recipe - Its fudge but not as you know it. I love the fact that its creamy , smooth , crumbly and not overly sweet . 
So perfect cut into chunks and wrapped up with a ribbon , it will always leave people wanting more ! This  comes from Chelsea Sugars website and is a Jo Segar Recipe, enjoy.


Russian Fudge


Ingredients


3 1/2 Cups white sugar
125 g Butter
3 Tbsp Golden Syrup
1/2 Cup milk ( full fat )
1/2 tsp salt
200 g sweetened condensed milk ( half a standard tin )
2 tsp vanilla essence


Place all ingredients except the vanilla, into a large saucepan.
Warm over gentle heat till nearly all the sugar has dissolved stir it gently every now & then
Bring to a gentle boil and cook for around 10 mins , starring gently to avoid it catching .
You will start to see the color changing to a rich caramel & it thickening up.
Keep boiling until it reaches soft ball stage (drop a small amount into a glass of cold tap water-  if you can roll the mixture into a ball you're good to go, to be sure do it twice ! )


Remove from heat and add the Vanilla. 
Beat with an electric beater till very thick and no longer glossy , the longer you can beat it the better , I keep mine going till its really really thick .
Pour into a lightly greased 20cm glass dish .
Cut pieces when soft & leave till cold to break up .


Caution : very addictive !


This post is part of Sweet New Zealand with thanks to my darling lemon thyme for hosting this months event ! Ps- check out my darling lemon thyme for the most delicious gluten free / vegan / amazing eats !

Saturday, 21 January 2012

Home made Bagels


So if the title of that doesn't get you drooling, what will ? Bagels are one of my long standing favorite things to consume , toasted with a smear of cream cheese, fantastic. So when a friend passed me along this recipe I was a little hesitant , are'nt bagels hard to make , almost a little mysterious , one of those foods that you never really cared how it came to arrive on your plate ? Well master 6 LOVES bagels & his appetite was becoming expensive for them  ( around$ 4.50 in NZ for 4 and not great quality )so when  I mentiond that we could make some he spent the next 3 days asking 'when are we making bagels ' ..... So with my trusty iPad ( honestly makes life so easy when using an online recipe ) we truged up to the kitchen & begun .... I actually really enjoy making bread so I had a blast , yes there are a few steps but its not hard in the least & the kids had a ball rolling them & creating the holes , flour was also flung far & wide but heck when your a kid thats half the fun right?  The end result AMAZING , fresh , delicious bagels which master 6 ate four of in a row .... I will most defiantly be making these again ! This is the original recipe here , instructions & pictures are pretty good !


Ingredients


2 Teaspoons active dried yeast
1 1/2 TB sugar
1 1/4 C warm water ( I used all this your may need more or less )
3 1/2 C Flour ( high grade or bread )plus a little extra for kneading
1 1/2 tsp salt ( I only ever use Himalayan salt , much better for you & taste )
couscous to coat bottom of bagels ( optional )


 I kept my bagels plain but you can experiment with toppings check link to original recipe here

Method

In 1/2 C warm water pour in sugar & yeast. Do not stir . Let sit for 5 mins then stir yeast & sugar together until it dissolves in water
Mix flour & salt in large bowl. Make a well in middle and our in the yeast & sugar mixture
Pour half the remaining warm water into well. Mix and stir in rest of water as needed , I knew straight away I would need more & plunked it all in . You want a moist firm dough .
On a floured surface knead the dough for around 7 - 10 mins until its smooth & elastic , Just knead & knead , it will reward you in the end !

Coat a large bowl with some oil & turn the dough in it to coat , cover dish with a moist tea towel
Let it rise for around an hour in a warm place , it should double in size. Punch the dough down ( my kids loved this bit ) and let it rest for another 10 mins

Divide the dough into around  8-10 pieces for big bagels or smaller bits for little ones , we had a whole lot of sizes going on , the kids enjoyed the mini ones !


Shape each piece into a round by pulling dough around on itself & sort of winding end pieces underneath - if all else fails end up with a round shape ! Press it against bench and move you hand in circular motion while spinning dough inside you finger circle until a perfect little ball emerges ( this part is easy & enjoyable ) repeat with all your balls of dough.

Coat a finger in flour and press into center of dough balls , stretch the ring out to get a decent sized whole


( around 1/3 diameter of bagel )

place them all on a oiled surface & cover with a damp tea towel again. Preheat oven to 220c

Bring a large pot of water to the boil. Reduce heat . Use a slotted spoon to lower bagels into water . Boil around 2-3 ( depending on size ) at a time , boil for 1 min each side or 2 mins if you prefer a chewier bagel.
I dipped the bottom of my bagels in couscous for a crunchy bottom like the store bought ones ( totally optional ) as the are build & dipped place them on a oiled baking tray

Bake for 15- 20 mins till golden brown

Eat & enjoy & never buy another bagel again !


Thursday, 19 January 2012

Perfect Pikelets


Pikelets are a funny thing, say the word & my mind conjures up images of my youth eating them on a cold wet afternoon piled high with butter & jam. 
They are according to wikipedia a type of pancake eaten in Australia & New Zealand, I guess if you were going to describe them!
 I would say they are a dense little american style pancake, but not really like a pancake at all !
 Most at home beside a pot of hot tea & rather more sophisticated piled with jam & whipped cream.
Children love them, adults adore them...but not all pikelets are created equal !
I have tasted & made some stodgy uncooked versions. 
There are numerous recipes & if you are lucky enough to be handed one down, or found one that works lucky you !
This one comes again from Alexia Johnstones - Ladies a plate  its simple & turns out perfect every time. Pikelets are the fall back staple for unexpected visitors, after school munchies. 
Eat them hot, straight of the girdle or pair them up & pop them in your lunchbox ...... simple goodness


Pikelets 


  • 1 egg
  • 30 g caster sugar
  • 170 ml milk
  • 125 g flour
  • 1 tsp baking powder
  • 15 g melted butter
  • 25 g golden syrup*
* optional - I think makes them better !

1. Heat a heavy based frying pan or if you have one an electric frying pan on med high

2. Put egg and sugar in bowl and beat until pale & fluffy

3. tip in the milk and sifted flour & baking powder and lastly the melted butter ( if using golden

    syrup melt this with the butter ) , mix to a light spongy batter - don't over mix

4. Grease the surface of your pan with butter and using a big spoon hold vertically and pour

     the mixture from the tip to make circles ( make about 5- 6 at a time )

5. Wait until bubbles appear on the top of pikelets and burst, then you know they are ready to

     be flipped,flip them carefully and cook for a minute more till nicely golden brown

6. Pile them between a clean tea towel till you are finished cooking them all, then spread with

     butter and jam or if your feeling fancy whipped cream & jam !


Thursday, 21 July 2011

Baked Berry Cheesecake


I have to admit I have never made a cheesecake before and was always slightly afraid of them ! Not to mention the eating of one but the baking !
So when I was asked by a friend to make a surprise cheesecake for her husbands birthday, I trembled ! 
She insisted and sent me this recipe here and I trembled a little more, I sent her this 'no bake' Nigella Lawson cheesecake but still insisted on the baked variety ! 
She really wanted cherries for him but I had no luck as we are totally in the wrong season & I couldn't even find them frozen. 
I picked raspberries instead as I always enjoy raspberries tartness in sweet creamy foods like this. 
I put my baking hat on and went to work, it turned out fab and looked pretty darn spectacular, I never tasted it but was assured it was delicious !
It was rather easy to make all in all, the trickiest part was most probaly  getting the cream cheese to a blend-able texture and as my dear old mixer wasn't going I had to use a hand beater. Many swear words later & voila it was ready to be put into the pan - even though mine did get a small crack in the top I use a fan forced oven & only put a small dish of hot water with it to cook to keep it moist, I would recommend this.


 Next time it will be perfect and oh yes there WILL be a next time !

Base
1 Packet of super wine biscuits or any sweet biscuit around 200 g 
80 grams butter melted
1 tsp cinnamon


Filling
750 cream cheese, at room temperature chopped ( 3 cartons of philly cream cheese ) 
 ¾ cup caster sugar 
2 tsp vanilla extract
4 eggs, at room temperature 
1 tbs lemon juice 
1 tsp finely grated lemon rind   
2 tbs plain flour    
300g frozen berries ( I used raspberries )  + extra thawed for the top if you like
Icing sugar for dusting            


  1. Preheat oven to 160c Grease a 22cm spring-form cake pan and line the base and side with baking paper or tin foil
  2. To make the base, break the biscuits and place in a food processor.  Process until finely crushed.  Add cinnamon and melted butter.  Process until well combined.  Evenly press mixture into the base of pan.  Refrigerate while you make the filling
  3. To make the filling, its best to use a mixer but hand beaters work if you use your wooden spoon for help & beat cream cheese, sugar and vanilla until thoroughly combined. Beat in eggs, one at a time, beating after each addition.  Add lemon juice, zest and sour cream and sift over the flour.  Mix on low speed until smooth.  Swirl through frozen cherries.  Pour mixture over biscuit base.  Bake for 1 hour and 10 minutes to 1 hour 20 minutes until just firm but the centre trembles slightly when the side of the pan is gently tapped.  Turn oven off and cool in oven with the door ajar until cool.  Remove from oven, leave to completely cool in pan, then refrigerate for 4 hours (or overnight) until chilled
 To serve, remove from fridge 30 minutes before serving.  Remove from pan and place on a serving plate ( I did this by using a plate on top & flipping then placing serving plate under and flipping again)  Dust with icing sugar and top with extra just-defrosted berries


Tuesday, 19 July 2011

Baked Lemon Sponge Pudding


More lemon recipes you say, why yes ! I guess I am including this as it is an absolute delight, one of the most delicious puddings you will ever taste. 


As the weather gets colder the oven gets warmer round at my house and puddings are made 2-3 times a week, a great way to use the heat in your oven after cooking a meal and heat the house with deliciousness!
If you like lemons & sponge pudding then you have got to make it, honestly if you just want a real popular pudding whip this bad boy up & serve it with some greek yoghurt and as we say in NZ Bobs your uncle ! A lemon sauce forms under the sponge that is similar to a lemon curd!
This recipe comes form the grandmother of home cooking in New Zealand, the one, the only Alison Holst  She is amazing, any recipe I have tried of hers is so tasty and easy. She does domestic goddess at its best. 
This beauty is from The Ultimate Collection , hands down the only cookbook you could ever need. But somehow cookbooks are like shoes one more is never enough ....

Baked Lemon Sponge Pudding

50 g butter
1/4 Cup plain flour
2 eggs separated
3/4 sugar
grated rind of 2 lemons
1/4 Cup ( 60 ml ) lemon juice
3/4 Cup ( 185 ml ) milk

1. Turn the oven to 190 c, melt the butter in a small pot, add the flour and stir
2. Put the egg whites into an ovenproof dish that you can make the pudding in ( 1 litre capacity) add the yolks into the butter mixture
3. Beat the whites until they form soft peaks, add 1/4 cup of the sugar and beat again until the tips of the peaks turn over when the beater is lifted from them
4. Add the reaming 1/2 cup sugar to the butter mixture with the lemon rind and juice.
5. Beat with the unwashed beater then add milk and beat again
6. Pour the lemon mix over the egg whites and fold gently to combine
7. Stand the dish in a larger bowl of hot water ( like a roasting dish ) , bake at 190c for about 40 mins until the centre is firm and golden brown - serve hot with ice cream or yoghurt & get ready to lick the dish.


 Serves 4 if your lucky !


Sunday, 10 July 2011

Crunchy Topped Lemon Loaf


Its been a while , I have been a slack little blogger , in between the winter blues & children's ills time has simply crept away on me. Good intentions turn into tomorrows never achieved !
Alas I have been baking tho ' As the saying goes when life gives you lemons - BAKE ! Hear hear .
A bag of home grown lemons make me soooo happy my mind is alive of things to do & bake , so as we here in NZ are right in the middle of winter , natures lil bag of sunshine has to be the citrus tree .
In fact I have just guzzled down a glass of freshly squeezed grapefruit juice made from fruit from my papa's tree - honestly this stuff is better than coffee , energy , HELLO !
I really think Lemons go the best in cakes , muffins & slices because of that tangy contrast they bring to the sweet . This recipe was a first for me but looked so divine !
It comes from Alexa Johnston's magical book ' A second helping ' which I use so often & never lets me down .
If you are after a little bit of sunshine on a winters day whip this baby up & sit down with a cup of tea for some lemony goodness - its quite moreish , don't say I didn't tell you so !


Crunchy Topped Lemon Loaf

For the cake -

115g butter
3/4 caster sugar
2 tsp lemon zest ( finally grated )
2 Eggs
1 1/2 cups flour
1 tsp baking powder
1/2 cup milk

For the topping -

1/3 cup caster sugar
2 TBsp lemon juice

1. Preheat oven to 180 c . Lightly grease a medium sized loaf tin

2. Cream soft butter and sugar until light & fluffy, beat in Lemon zest then add eggs one at a time, beating well after each addition.

3. Use a metal spoon to gently fold in sifted dry ingredients a third at a time, alternating with the milk.

4. Pour the mixture into tin, smooth the top & bake for about 40 mins, rotating halfway through for a nice even bake. The cake will be a golden colour with a crack running along the top and should be just pulling away from the sides of the tin. Remove from oven and place on a cooling rack still in tin.

5. For the topping, combine the sugar and lemon juice in a small jug then slowly pour over the top of the still hot cake. It will soak in a little and run down the sides, leaving a thin crust of sugar on the top. Cool in tin the turn out carefully - slice and enjoy !

Monday, 20 June 2011

Lemon Sour Cream Cake


As the days are getting shorter and colder here in NZ its always nice to have the bright flavour of lemons to lift the spirits . This yummy moist cake is defiantly a favourite !
I love lemons and still remember when I first tasted this gem , it was like a velvet , lemon curd that wasn't to sweet or to tart in fact - PERFECT !
I had to have the recipe ... Apparently it is Julie Le Clerc recipe , I have never seen original copy or what book it is from , as it was handwritten out my a dear friend who had made it and passed on & quickly stuck into my ' little black book ' of recipes .
Every great cook or baker has one of these , if you dont I suggest making one for all those hand down , found , cut out , scribbled down recipes .... such a great tapastry which I hope to pass down to my boys one day.
 Any way before I get all sentimental over my recipe book , the lemon cake ! I always use natural yoghurt instead of sour cream . Totally up to you here , I prefer yoghurt and have made with sourcream but think yoghurt offers a nicer texture . Never forget the lemon syrup at the end this is what give the cake a moist tangy sweet yumminess . I also omit the lemon essence from the original - cant see why you would need it . I hope you have a lovely friend like I do that has a unlimited supply of lemons from her tree for me ! Anytime I make this I am asked for the recipe ... such a wonderful dessert


Lemon Sour Cream Cake

125 grams Butter
3/4 Cup Sugar
Finley Grated zest of one lemon
1/2 Cup sour cream or natural unsweetend yoghurt
3 Eggs
1 Cup plain Flour
1 tsp Baking powder

Lemon Sugar


juice of 3 lemons
1/2 Cup caster sugar

1. Preheat oven to 160 c , grease and flour a smallish cake tine
2. Cream soft butter , sugar until pale , Beat in zest , eggs and sour cream or yoghurt
3. Fold in sifted ingredients till just mixed pour into tin , bake for 30 - 40 mins until top is golden and a skewer come's out clean ( while its cooking , mix lemon juice & sugar in a small jug )
4. Remove from oven , stab cake all over with skewer and pour over lemon sugar
5. Leave in tin till cool and turn out onto plate , pile high with fresh whipped cream or Greek yogurt

Sunday, 5 June 2011

Banana Yoghurt Cake


There has been far too much biscuit posting on here lately, so before I post yet another biscuit I will share my easy as, never fail, sure to please banana cake !
It always seems that in the fruit bowl there are always a couple of sad looking bananas hanging round. So living in the philosophy of ' waste not want not ' they always end up in my cake !
I am not a huge fan of banana cakes but my family eat them & I will force myself to consume a piece , every now and then at my own peril.
This recipe comes from a oldish cook book called ' quick 'n' easy cakes & muffins , biscuits , slices & more'  by Robyn Martin , which if you click the link was a best seller in its time ( 1991 ) she is still a wonderful publishing NZ baker.
I have had this book since I was around 12, and it has been used & used, with splattered pages, a great testament to any cookbook .  There is no creaming or complicated instructions and it turns out every time, which is why as a novice baker I liked it !
She suggests a lemon yoghurt icing , but I prefer a coffee icing - with walnuts stuck on top ( which the kids always pick off ). You can even get away with no icing if you are rushed or lazy!
A simple dusting of icing sugar will do the trick .

Banana Yoghurt Cake

150 g Soft butter
1 Cup sugar
2 eggs
1 Cup mashed banana ( around 3 ripe )
Grated rind of one lemon ( finely grated )
1/4 plain sweetened or unsweetend yoghurt ( or any flavour you have lurking in the fridge )
2 Cups flour
1 tsp Baking powder
1 tsp Baking soda

Coffee Icing

1 tsp instant coffee
1 tsp boiling water ( more to mix )
1 tsp butter
Around 2 cups icing sugar

1. Turn oven  to 180 c -Place butter sugar, eggs, banana, lemon rind and yoghurt in a mixer bowl & mix on low speed to combine ( can always be done by hand , no worries )
2. Sift in flour, baking powder and baking soda
3. Beat on low speed to combine then increase speed & beat for 2 mins
4. Pour into greased or paper lined tin , 18 cm
5. Bake for 45 - 60 mins until skewer comes out clean - it will be quite brown, dont worry !
6. Leave in tin for 10 mins before turning out onto rack , Ice when cool

Coffee icing

1. Sift icing sugar into bowl
2. Melt instant coffee in boiling water
3. Add instant coffee with butter and start to stir adding more boiling water in small amounts till you have a nice consistency to ice (  consistency of soft butter )
4. Spread it on cake & throw on some walnut half's if you like , any nut will work !


Monday, 30 May 2011

Melting moments & yo-yos


One of my most favourite biscuits is a Yo-yo a small buttery biscuit sandwiched together with icing & made with custard powder . Melting moments biscuits are very similar only made with cornflour instead of custard powder and are equally tasty & yum . As the name suggests they provide a truly melting moment ! Melting moments apparently came first and the yo-yo biscuit was an adaption as the popularity of custard powder grew in NZ in the 1940's , no thanks to our famous brand Edmonds .  Custard powder is really just cornflower flavoured & coloured but for me it provides a supreme flavour and texture in the Yo-yos . So easy to make and even easier to eat , my son always asks for these and a batch never lasts for long .
This recipe is taken from A second helping - more from ladies a plate by Alexia Johnston , which is divine NZ home baking recipe collection . Nearly forgot to add this was part of our Royal wedding supper , bite sized delights !


Melting Moments & Yo-yos

For the Biscuits -
170g butter ( soft )
55g icing sugar
170g flour
55g cornflour* ( *for yo-yos replace with 55g custard powder )
1 tsp baking powder

For the filling -
30g butter
100g icing sugar ( more if needed )
2 tsp boiling water
2 tsp custard flour ( for *yo-yos )

1. Preheat oven to 180c and line two baking trays with baking paper
2. Sift together icing sugar, flour, cornflour* and baking powder
3. Cream butter until light and fluffy, then mix in dry ingredients to make a firm dough.
4. Roll walnut sized balls and place on trays - make sure you have an even number so you can sandwich together !
5. Flatten them with a fork
6. Bake for 15-20 mins rotating trays after 10 mins to ensure even baking - they will spread slightly and be pale gold - cool on rack

Icing -

1. Set out half flat side up to be iced , keep others near by
2. Melt butter in small saucepan and add boiling water
3. Pour onto sifted dry ingredients to form a smooth paste , you may need to add a little more icing sugar to make icing pliable & set fast, it should be fairly thick
4. Distribute icing as evenly as possible & wait till all iced before putting un iced tops on and rotate slightly as you put them on so filling moves out to edge of biscuits


Monday, 16 May 2011

Royal wedding Lamingtons !

I know , I know jthe wedding is sooo last week , well actuallly so last 2 weeks ago... but we had a little party when we were watching it on April 29th ! I thought that called for some baking & because my life just seems to be getting more busier by the week I have just got around to posting this ! I guess the Royal fever has died down a little bit ...but my baking lives for ever - just like I hope Wills and Cates love will ( awwwwww ) . Now on to the important part what did I bake ? I opted for a Kiwi take on our royal connection as part of the commonwealth nations . I chose Lamingtons & Melting Moments , probaly two of the most popular baked goods in NZ not counting custard squares ( thats a whole other post ). Lamingtons are like a victoria sponge dipped in chocolate sauce  ( or can be raspberry ) & rolled in desiccated coconut , split & filled with whipped cream & Jam - yes almost heaven !

I have never made Lamingtons before - eaten a lot , some bad some ok & others really good ( few & far between ) , These lamingtons were DEVINE .

 Both recipes came from two wonderful books by Alexia johnston  - Ladies a plate & A second Helping ... which are my favourite NZ baking books in the world !


Lamingtons

For the cakes :

115 g butter
3/4 cup caster sugar
2 eggs
1 1/2 cups flour
1 tsp baking powder
1/2 cup milk
1 tsp vanilla essence

Lamington Syrup :

500 ml water
55 g butter
450 g caster sugar
55 g cocoa

Coating & filling :

Whipped cream ( 200 ml ) always whipped with icing sugar
225 g coconut ( more or less )
Jam of your preference ( I used plum )

Mixing & Baking -

1. Preheat oven to 180 c . Line a 20 cm square tin with baking paper
2. Cream butter until smooth , add sugar gradually and beat till mixture is light & fluffy
3. Add eggs one at a time , beating well after each addition
4. Sift flour & baking powder together add add to the mixture alternatively with the milk and vanilla
5. scoop into prepared tin and bake for around 20 mins until golden . Cool on rack
6. store airtight until you are ready to use , best the next day & cut into squares

Chocolate Syrup -

1. Bring everything to the boil , stirring , then leave to cool before using ( as this makes heaps of syrup you can keep it in the fridge for next time )
2. Put the desiccated  coconut in a large bowl
3. Use a fork & drop each piece of sponge into chocolate sauce completely  then shake off excess & roll in coconut evenly . Set aside on a rack to dry


4. About an hour before serving them slice them almost through on a diagonal and spoon the whipped cream in , finishing with a dollop of Jam !

Sit back and admire them , then eat eat eat !

Sunday, 1 May 2011

Anzac Biscuits

Last week ( April 25 ) in New Zealand it was Anzac day - a national day of remembrance that commemorates those killed in war as well as honouring returned servicemen and women. Read more about it here . The Anzac biscuit was apparently made for soldiers by there mothers at home and sent over to the front line - although I have heard this was a romanticised version of the truth and the biscuit didnt start being made until well after the war ! Anyway the notion behind it is the same a good hearty biscuit that can withstand the rigors of lunch boxes and biscuit tins alike.
I found this recipe in the paper the weekend of anzac day by Geoff Scott of Vinnies . It included walnuts which is the traditional version , most modern recipes omit this , but I always thought it gives them crunch & we have a huge bowl of fresh walnuts from Nelson begging to be used !
The biscuits were perfect & the vanilla gave them a real caramel sweetness !


Anzac Biscuits 


1/2 tsp baking soda
2 TBSP boiling water
125 g Butter
1 TBSP golden syrup 
1 tsp vanilla extract 
3/4 Cup flour
1 cup rolled oats
1 Cup coconut ( desiccated )
1 Cup chopped walnuts 
1 Cup brown sugar


1. Preheat oven to 120 c 
2. Line 3 oven trays with baking paper 
3. Dissolve baking soda in boiling water 
4. Melt the butter with Golden Syrup then add water & soda mix
5. Combine remaining ingredients in a bowl add in liquid butter mix
6. Stir well and roll teaspoon full's on tray and lightly press with a fork.
7. Bake for 25 mins till golden and transfer immediately to a rack to cool .


Store airtight and they last for ages !

Monday, 25 April 2011

Cinnamon Sponge

Sponges hold a dear place in my heart , not only for there flavour & delicateness but because as a younging growing up in hamilton there was a bakery called 5 X roads kitchen . They used to make the most amazing sponges with passion fruit pulp & fresh whipped cream , which we would often get on our birthdays . I have NEVER attempted  a sponge before this one which was made for me by a friend whom saw the recipe in the good old womans weekly. She seemed to have no trouble & it turned out super . So my 'fear ' was subsided somewhat - The flavour blew me away , like a gingerbread flavour & a sponge texture , heaven .... So I jumped in - armed with my trusty hand held beater ( yes the mixer went BANG a few months ago ) I know if you make this you will love it & impress friends or family , give it a go its not hard, oh and its gluten free !


Cinnamon sponge

4 Eggs
3/4 Cup sugar
2 tsp Golden Syrup ( americans this is what that is )
3/4 Cup Cornflour
1 tsp Baking soda
1 tsp cream of tartar
1 tsp Cinnamon
1 tsp Cocoa
Jam
Icing sugar
Whipped Cream to fill

1. Preheat oven tp 180 c , line 2 cake tins with baking paper ( I made sure mine came up past the edge of tin )
2. Beat eggs , sugar  & Golden syrup for 10 mins , the mixture will go an amazing thick consistency
3. Sift over combined dry ingredients
4. Fold into egg mix , I used a metal spoon to keep air in the mins
5. Bake for 16 mins ( on the dot )
6. Cool in tin for 10 mins - then turn out carefully and keep air tight till required
7. Slather one side of sponge with any flavour jam you like & sandwich with fresh cream ( approx 150 ml )whipped with a dash of vanilla essence & sprinkle the top with icing sugar .
Eat immediately ! If there is any left over store in the fridge in an airtight container

Sunday, 17 April 2011

Feijoa cupcakes

Well its been quite a week , my oven BROKE yes , stopped working - well the grill still works & the hobs but not the bit that is most important , the oven that bakes the goods!
So I thought that is a great opportunity for me to catch up on a backlog of baking blogging.

I made these tiny little cupcakes after finding there recipe in the New Zealand Gardner home growen recipes magazine , find their blog here. Its a magazine but every now & then they bring out a recipe magazine , this one is chock full of yummy treats and baking ... all from New Zealand kitchens . I loove cupcakes but have found by trail & error that some recipes are terrible - more about my favourite cupcake recipes later.Yes the Feijoas are still plentiful as we head towards the end of april , so I am desprately trying to find uses for them, this is a great one and produced light and delicate flavoured cupcake iced with a simple lemon icing , made in haste by me as I was already late on a school pickup.


Feijoa Cupcakes

100 g butter softened
3/4 White Sugar
1 tsp vanilla essence
2 eggs
3/4 C mashed feijoa flesh
1 tsp baking soda
2 TB hot milk
1 1/2 C Flour
2 tsp baking powder

Preheat oven to 180 c.
Cream butter and sugar . Add vanilla , eggs and feijoa flesh. Stir Baking soda into hot milk ; add to cake batter . Fold in dry ingredients - don't over-mix . Spoon into patty cases in your muffin trays to hold shape . Bake for 15 - 20 mins . When cool ice with lemon icing ( squeeze a lemon into sifted icing sugar until you have a spreadable consistency )

Sunday, 10 April 2011

Jam Drops !


I bet most of us that spent our youth in NZ remember these sweet & yummy biscuits . My kids love them and they are super easy to make . Great if you have some jam hanging round thats begging to be used - I made two batches the first were ahem quite large with home made plum jam which has that natural tartness, the second batch were more humble & about the right size , with delicious strawberry homemade jam ( yum ) that has its own sweetness. It really depends on your own preference ! This is probably the easiest Jam drop recipe I have come across which I found here . I like to try out different variations on the same recipe & always read the comments on recipes from websites which gives you the best idea of the finished article !

Jam Drops

125 g butter
2 Eggs
3/4 Cup sugar
2 Cups self Raising flour
Jam of your choice ( about 1/4 cup )

Soften butter & cream with sugar until light and fluffy.
Add eggs one at a time beating well after each addition then mix in flour to form a stiff dough.
Roll with your hands into walnut sized balls or golf sized they rise quite a lot so be warned.
Use your index finger or end of a handle that is rounded to make dents in each one , deep enough so jam will sit in it.
 Add jam into holes and bake at 180 c for 10 -15 mins - Enjoy !

Monday, 21 March 2011

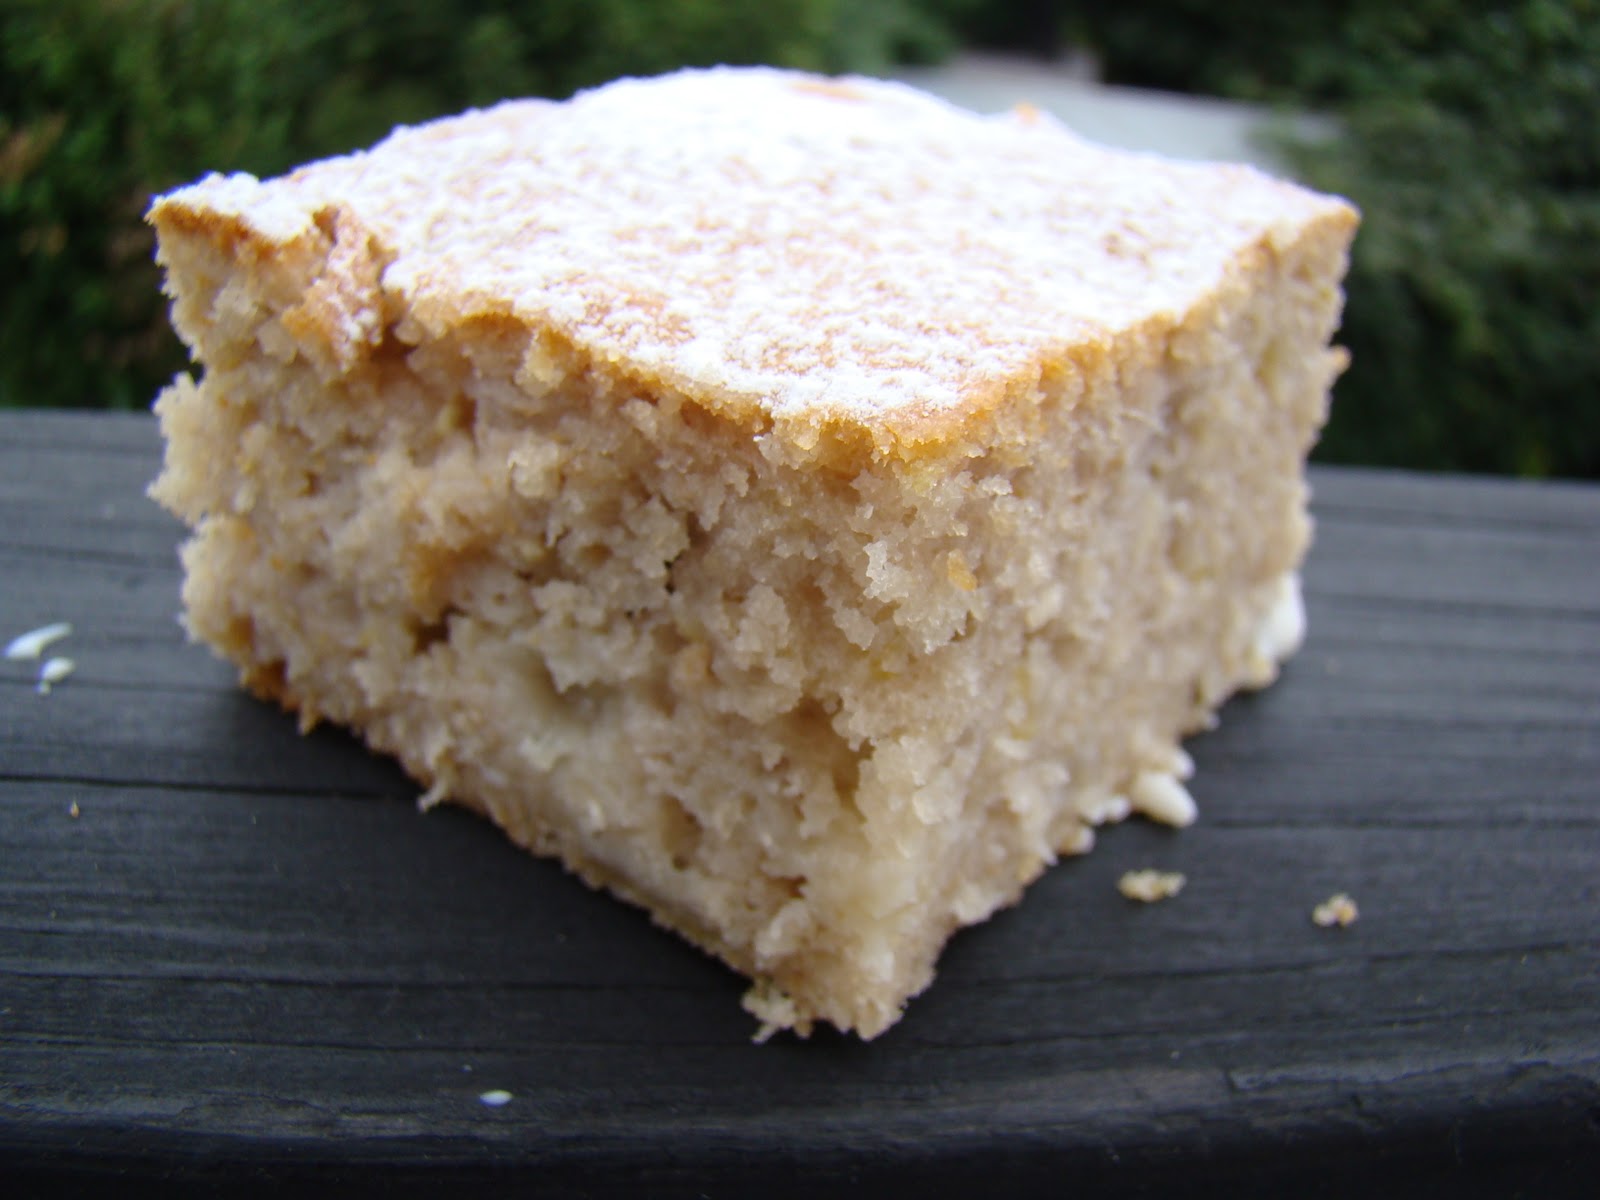
Feijoa & Coconut sqaures


I have eaten a few yummy Feijoa cake / slices ,  but this one sticks out in my mind as one of the most memorable . So when I was searching around for recipes to share with you all I knew I would include this one .
I got hold of a friend who had made it a few years ago and said she ' had to get me THAT recipe ' so thank- you Mrs AlisonTomlin !
I think I like it so much as it combines the delicate flavours of lemon & coconut with the tartness of the Feijoa - if you have never tried one they are sweet like a pineapple but have that tartness to them like the pineapple too , indescribable really !

The texture here is also very moist and light - yes you will want more !


 Feijoa and coconut squares


100g butter
125g sugar
55g desiccated coconut
3 eggs
1 lemon
300g feijoa flesh (approx 12 fruit)
175g flour
1 tablespoon baking powder

Preheat oven to 160 degrees fan bake. Grease 20cm round baking tin ( but square will work too as its cut into squares ). Place diced butter in saucepan or microwave and melt over low heat. Transfer to a mixing bowl and mix in the sugar. Add the coconut and whole eggs and beat until well combined. 
Halve the fruit and scoop out the flesh. Chop into small pieces and combine with the mixture. Add the finely grated rind of the lemon and mix well.

Sift flour and baking powder and mix into the batter. Pour the batter into the tin and bake for 30- 40 mins or until a fine skewer or toothpick inserted into the centre of the cake comes out clean. Transfer to a plate and leave to cool.

Cut into squares, sprinkled with Icing sugar and serve with some fresh halved fejoas on the side, and some fresh yoghurt or cream if desired. Great eaten hot !